Photographic Tours in Sydney
If you have an SLR or mirrorless camera and want to see some interesting sights around Sydney with a local photographer, please consider these tours. They are aimed at people who:
want to see the traditional and not-so-traditional sights of Sydney
wish to improve their photographic skills, eg how to manually use the aperture, shutter speed and ISO controls
have an SLR or mirrorless camera
are at the beginner to intermediate skill level
Route
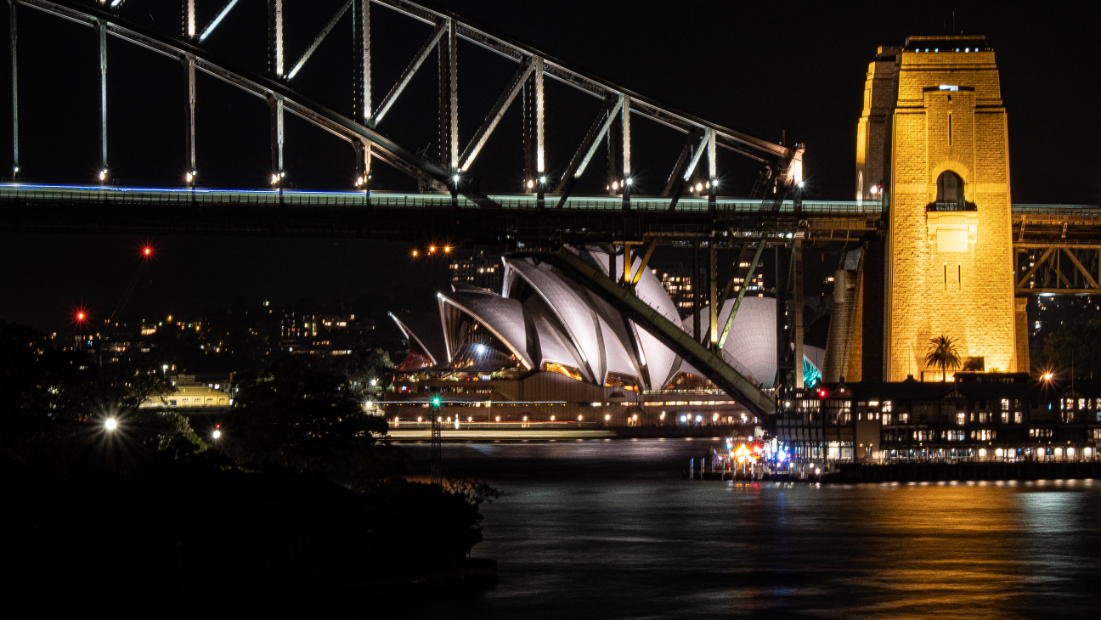
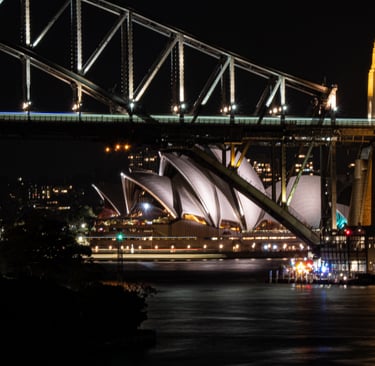
I start my Sydney photographic tour at Circular Quay, where we'll have a coffee overlooking Sydney Harbour Bridge. During the coffee, I'll go through camera and photography basics, including the exposure triangle, depth of field, auto focusing and composition. I will get an understanding of your capabilities. We'll then head over to the Opera House, where we'll also get a better view of the Harbour Bridge.
If you desire, we can take a ferry across the harbour to take photos of the city, opera house and bridge from the other side.
Next we will walk through The Rocks which is adjacent to Circular Quay - it was established shortly after the colony's formation in 1788. This gives a flavour of early settlement with original buildings. Then we will head up George Street, which is a traffic-free avenue apart from frequently running trams. There are numerous laneways linked to this avenue.
Another highlight of the walk is Martin Place, which runs off George Street. The sandstone General Post Office was built here from 1866 and is of the Victorian Italian Renaissance style. Martin Place is a pedestrian precinct and is a terrific place for taking pictures.
Your Sydney photographic tour continues up George Street to the Queen Victoria Building (QVB), Town Hall and St Andrews Cathedral.
The tour's route is based on my experience as a working street photographer.

Variations
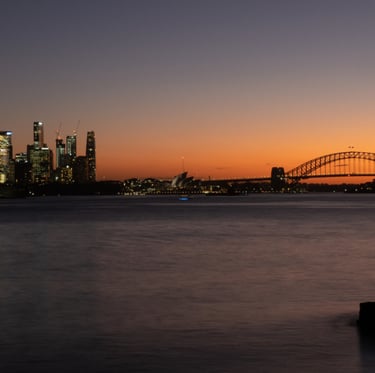
You can vary this route as long as the others in the party agree, or you can have a private tour and nominate your own route. The best light is at dawn or dusk (the "golden hours") and I strongly suggest we make a tour for those times.
As an alternative to the morning schedule, we could do an evening tour, concentrating on harbour shots. Then the lights of the bridge, opera house and city are magnificent. You will need a tripod for an evening Sydney photographic tour.
A ferry across the harbour would enable you to photograph the city skyscrapers and opera house, together with the harbour bridge.
Summary and Cost
I am flexible: if you have a certain time and duration in mind, let me know
Normally, I will start at 7.30am at Circular Quay
Along the way, I will look at your photos and give feedback
The cost is AUD $200 per person
The maximum group size is three, and if there is only one or two, we will still do the tour
The emphasis is on seeing Sydney, learning some camera craft, and having fun
Bookings
Because these Sydney photographic tours are very flexible, please email or phone me or add your email address (see below) and I'll get back to you. Then we can discuss options.
You can change or cancel a tour booking up to 24 hours before its start time, at no cost.
Notes on course content
Here is an introduction to the topics covered in the tour.
Exposure Triangle
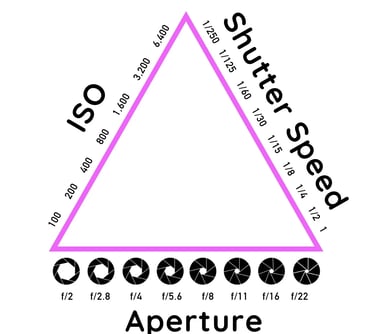
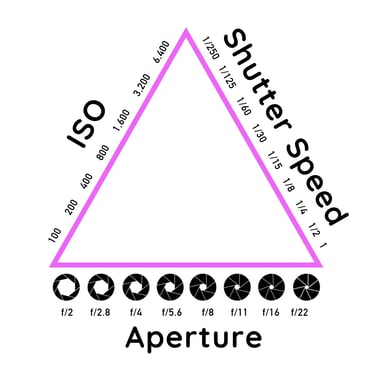
There are three elements involved in achieving the correct photograph exposure. These are:
1. ISO. This is the overall brightness within an image, measured numerically. For example, 200-400 is considered a normal ISO, while 3200 is high.
2. Aperture. This is measured in f-stops. A lens with an aperture range of f/2.8 - f/22 means it can open as wide as f/2.8 (letting in the most light) or close down to f/22 (letting in the least light).
Unique to photography, aperture affects the depth of field, meaning the distance range within a scene that appears sharp in a photo. A wider aperture creates a shallower depth of field (limited sharpness) while a smaller aperture creates a larger depth of field (greater sharpness).
3. Shutter speed. The speed at which the shutter opens and closes, measured between perhaps 30 seconds (depending on the camera) and 1/8000 of a second.
Reciprocity
This says that when an element is changed (changing the light exposure) using shutter speed, aperture or ISO, a reciprocal movement needs to be made in the other elements, if you want to maintain the exposure. For example, if you increase your aperture (letting in more light), you can increase your shutter speed (exposing the sensor for less time) to maintain the same exposure. Similarly, if you increase your ISO, you can use a smaller aperture or faster shutter speed.
Depth of field (DoF) is the distance between the closest and furthest objects in a photo that appears acceptably sharp. The following sketch explains DoF well. Thankyou to https://photographylife.com/what-is-depth-of-field for the sketch.
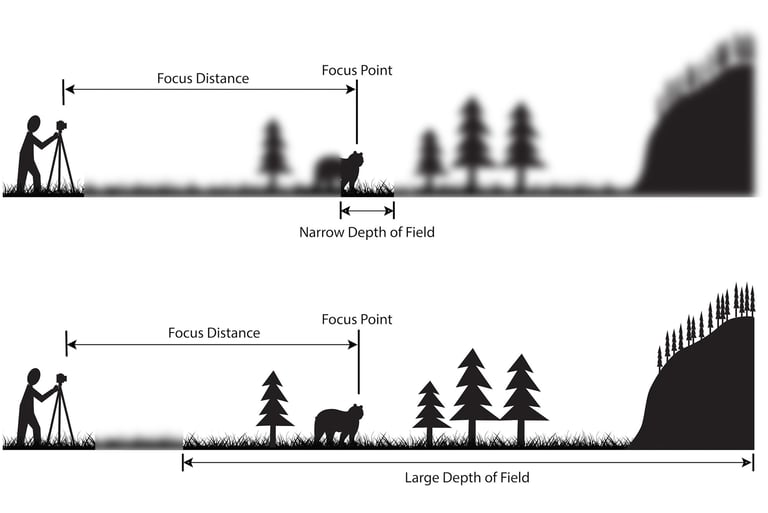
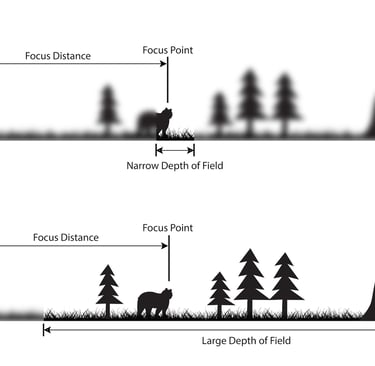
For a very narrow DoF, a large aperture is required eg f1.8. If you want everything in the frame to be in focus, select a small aperture such as f22.
Focusing
When you are doing street photography, you have some options in terms of focusing. The first is single-point auto focus: once you press the shutter button halfway, the focus remains static, whether the subject moves or not. Secondly, continuous-point auto focus locks on the subject when the shutter is halfway-pressed, even when the subject moves, unless something moves in front of the subject.
I have noticed lately that I have blurred the subject because they were moving, especially across the frame, and street photography requires a fast response by the photographer. One way to overcome this is to use zone focusing. It requires you to:
set the aperture to f8 - f11 which provides a longer depth of field
set the camera mode to aperture priority
switch to manual focus and focus on the subject or subjects
press the button and your image will be sharp from back to front
Depth of Field
Portfolio
Showcasing our best photography work for you.
Contact
Follow
trevor.reeves@iinet.net.au
0401 054 534
© 2025. All rights reserved.